Now is a good time to rearrange art or hang pictures that have been sitting around for a while. Do you cringe when you think of poking (more) holes in the wall…? Hanging the perfect gallery wall is easier than you think! With four simple steps you can hang art like the pros (don’t worry, we won’t tell!).
Plan Your Layout
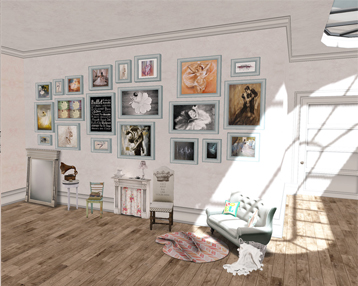
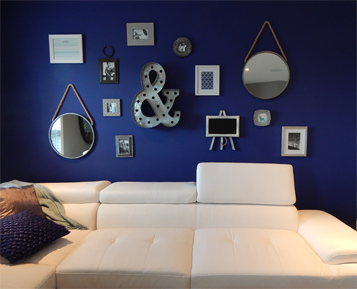
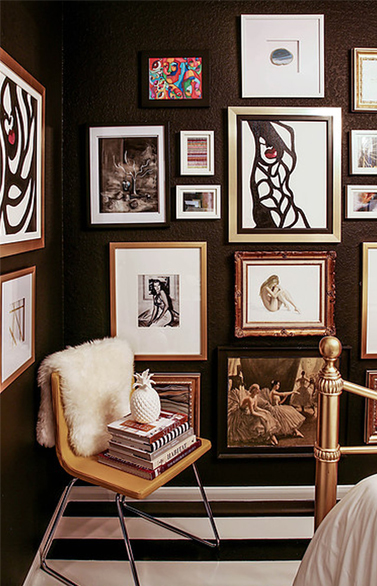
Determine the place you want to hang your arrangement, and create a pretend layout first. Whether you lay the actual pieces on an open flat floor surface or cut paper shapes the size of your frames and tack them to the wall, be sure to try lots of different placements, turns, and scenarios. This is the time to experiment with spacing and placement that you might not have considered before!
Measure, Measure, Measure
The general height and placement recommendation are to set the top of your lowest piece at 58 inches above the floor. As you add other artwork, leave two inches (or more, depending on the look you’re going for, just be consistent) around each frame on all sides. If there’s furniture against the wall you’re designing (say a lower sofa or buffet table), try placing the bottom of the lowest picture 6 to 8 inches above the top of the piece of furniture. Keep in mind that these are general recommendations – be sure to create your layout based on what’s best for YOU!
Don’t Let It Fall
Always use two hooks to keep frames stable on the wall, especially on large frames. Use heavy-duty anchors if a single piece is over about 55-60 pounds, otherwise, two general hooks per piece should suffice. Smaller frames, like 5×7 and 8×10 frames, could get by with one sturdy hook in the center of the piece.
Spacing is Everything
The two hooks should be spaced apart by about half the width of the frame. For example, if a piece is 24 inches wide, there should be 12 inches between the two hooks, so each hook should be 6 inches from the edge of the frame. This will ensure each hook bears equal weight from the frame on the wall. Be sure to use a level to mark your hook points before nailing them into the wall.